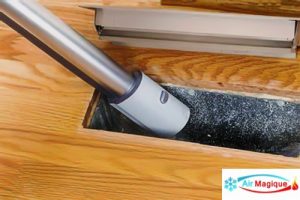
As the duct kings says, air duct cleaning is an essential cleaning service for your home to ensure the deep cleansing of your furnace and high indoor air quality.
So air duct cleaning is not a do-it-yourself project, as you can always engage professional air duct cleaners with specialized tools to help you with this demanding task. For air duct and AC cleaning, call Air Magique 24/7!
And just like most house owners, you probably wonder about the exact step by step processes done by your duct cleaner.
Read on to learn about the most recommended step-by-step process to clean your ducts:
Step 1: A Thorough Inspection of the Ducts
Consider it a sign of competency when your technician initially inspects the supply and return registers prior to commencing with the cleaning process. This step allows the technician to determine the extent of build-up before cleaning, to know if there are signs your central air ducts need cleaning, as well as check for leaks and other duct issues that require attention.
Note that leaks in the air ducts cause your HVAC system to underperform. Make sure to engage the services of a technician experienced in repairing and replacing ductworks.
Step 2: Use Negative Pressure Vacuum
Creating negative pressure is an effective way to clean your ductworks, so you do not end up inhaling polluted indoor air.
Here are the steps to air duct cleaning process with negative pressure:
- The vacuum collection device’s hose is hooked to a duct close to the air handler.
- The cleaning contractor will need to cut a hole in the duct, insert the vacuum hose and seal it tightly
- The next step is to seal the registers
- Turn on the vacuum unit to create negative pressure
We recommend shutting all of the air supply registers to enhance the negative pressure. The vacuum will then be turned on to start with the cleaning, one duct at a time.
An important thing to consider is to do a thorough cleaning of both the supply and return sides. If you ask yourself how many return air vents do you need? check our post about it.
Step 3: Agitate the Dust
Your specialist will use strong suction gear to clean the ducts as they go through the air duct cleaning steps.

Problem with settled dust?
You don’t have to worry as your technician is equipped with powerful instruments, including a revolving brush and air whipping tools to stir movement of settled dust.
The supply-side ducts and return vents will be cleaned, and expect your air duct contractor to remove settled dust from the main lines, allowing for more efficient vacuuming.
Step 4: Clean The HVAC System and The Furnace
Reassessing your HVAC system is imperative once the ducts and vents have been cleaned.
Note that the NADCA (National Duct Cleaning Association) suggests cleaning all the HVAC components, including the blower motor, drain pan, and evaporator coil. The cleaning of these components contributes to the improvement of the quality of air circulating in your home.
Moreover, after cleaning the system, your technician should tidy up after themselves. For example, they should make sure the rooms are not any dustier than when they arrived.
A good air duct technician would like to take you on a tour of their work so you can see the quality of their work.
What to look for when hiring a reputable air duct cleaner
You’ve probably experienced having your air ducts cleaned and were unfortunately not satisfied with the outcome.
In response to this common unsatisfactory house owner experiences, the NADCA developed a standard air duct cleaning process.
Here are the qualities to look for when hiring a professional duct cleaner:
- Proven experience and knowledge in using proper ductwork methods
- Use safe and effective tools designed for duct cleaning
- It helps to look for reviews of their prior work
Are you looking for a professional for air duct and AC maintenance? Call us right now!