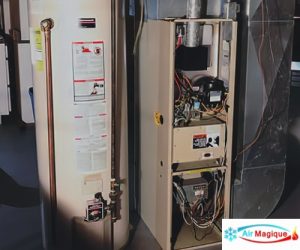
Installing a new furnace is a significant investment that can greatly impact your home’s comfort and energy efficiency. A successful furnace installation requires careful planning, proper sizing, and professional expertise to ensure optimal performance and safety. In this blog post, we have provided a step-by-step guide to help you navigate the process of furnace installation and make informed decisions for a successful and stress-free experience.
Step 1: Assessing Your Heating Needs
Before beginning the installation process, evaluate your heating needs and consider factors such as the size of your home, insulation levels, and the local climate. A professional HVAC technician can perform a heat load calculation to determine the appropriate furnace size for your specific requirements, ensuring you get the right heating capacity without overspending on an oversized unit.
Step 2: Choosing the Right Furnace
Selecting the right furnace is crucial for long-term comfort and energy efficiency. Consider factors such as fuel type (natural gas, propane, or electric), energy efficiency ratings (AFUE), and additional features like variable-speed motors or smart thermostats. Consulting with an HVAC expert can help you make an informed decision based on your budget and heating needs.
Step 3: Preparing for Installation Day
Clear the area where the new furnace will be installed to allow easy access for the technicians. Ensure that all obstacles and clutter are removed to facilitate a smooth installation process. Additionally, make arrangements for proper disposal of the old furnace, if necessary.
Step 4: Professional Installation
Hiring a licensed and experienced HVAC contractor for furnace installation is important to ensure safety and proper functioning. Professional technicians have the expertise and tools to handle the installation accurately, complying with local building codes and safety regulations. They will also ensure that all connections and components are correctly installed for optimal performance.

Step 5: Venting and Airflow Considerations
Proper venting is crucial for the safe operation of your furnace. The HVAC technician will assess the existing ventilation system and ensure it meets the requirements for the new furnace. Proper airflow is also essential for efficient heating. The technician will inspect the ductwork for leaks and make any necessary adjustments to optimize airflow.
Step 6: Testing and Calibration
After the installation is complete, the technician will thoroughly test the furnace to ensure it is operating correctly. They will also calibrate the thermostat and make any necessary adjustments to ensure proper temperature control and comfort.
Step 7: Safety and Compliance Check
The HVAC technician will conduct a safety and compliance check to ensure that the furnace installation meets all safety standards and local building codes. This step is essential for the well-being of your household and to prevent potential hazards.
Conclusion:
A successful furnace replacement or installation requires careful planning, professional expertise, and attention to detail. By assessing your heating needs, choosing the right furnace, preparing for installation day, hiring a licensed HVAC contractor, considering venting and airflow, and conducting thorough testing and safety checks, you can ensure a smooth and successful installation process. Investing in professional furnace installation will not only enhance your home’s comfort and energy efficiency but also provide peace of mind knowing that your heating system is installed correctly and will perform reliably for years to come.